
My obsession with smoking meat started about 7 years ago when I purchased my “Chargriller Smokin’ Pro” offset smoker/grill. I had one years before, but never learned how to use it properly (this was before the days of having the internet on your phone). I knew it was cheap but it’s all I could afford at the time. I figured I could still get some good BBQ out of it, and it functioned as both a grill and smoker, which was what I was looking for. I read that you needed to make some modifications to it, but later realized that most these were of no real use. This smoker leaked smoke everywhere and there was no stopping it.
This smoker is kind of like a barrel cut in half with an attached firebox and there is no way to seal the door like you can on some other smokers. It is designed quite poorly. One positive is that the grill has a moveable coal grate that moves up and down to get the coals closer to the meat when needed. This was great for grilling, but I discoverd that during a smoke, if I turned this over it helped to baffle the heat coming out of the fire box. Also, putting a water pan over the gap on the firebox side helped block some of the direct heat and dispurse the smoke, heat and moisture more evenly throughout the cooking chamber. This was a plus, and helped quite a bit, but a good smoker will keep all the smoke in the cooking chamber so that it flows through and out the stack for a more consistent temperature. This one does not. In addition to the design flaws with this smoker, the one I received was missing parts, but I didn’t feel like returning it so I dealt with not having a handle on the sliding coal grate in the firebox or the upper shelf in the cooking chamber.
My first smoke was ribs for a Memorial Day party. I was smoking 6 racks of spareribs for 12-15 people, and following that up with grilling some corn and skirt steak. I did my research and tried to keep the temperature at 225 degrees and follow the 3-2-1 method for the ribs; 3 hours smoking at 225 degrees, wrap the ribs in foil with a touch of apple juice for 2 hours, then unwrap and cook with sauce at 225 for 1 final hour. They were delicious and I thought they had come out perfect! There was that nice pink smoke color, they were falling off the bone tender, I didn’t oversauce them; everything seemed to work out. Only later (like in the last few months after successfully smoking a Texas style brisket) did I realize the smoke flavor was lacking. I used soaked hickory wood chips to create that smoke that I thought would be so delicious, but it turns out this does not create the “good” smoke. Instead, it creates the thick, white smoke that can give the meat a bitter taste. Luckily, ribs only get smoked a few hours, unlike a brisket which can go much longer than 12 hours, so you don’t really notice the bitter taste. The clean, “blue” smoke is what you should be looking for, and wood chips are not going to give you that kind of smoke. For a small offset smoker you are most likely going to need wood chunks or small splits. I opt for the splits, though I can only use one at a time in order to keep the temerature down. I also recently learned that to get the clean “blue” smoke, the wood needs to burn, not smolder. That white smoke you think is doing its job is actually ruining the meat, particularly when smoking something like a brisket because it gets so much of the smoke flavor for so long. You should barely be able to see the smoke and there should be flames in the firebox throughout the cook.
It took me years to learn this, but I was primarily smoking ribs, which, like I said earlier, only get a few hours of smoke. In my last smoke I learned that a half a chimney of hardwood lump charcoal (it burns much cleaner and hotter than briquettes) and 1 small log creates the perfect temperature/smoke ratio in my smoker. It kept the temperature at 225-250 degrees and created that clean blue smoke we are loooking for, but every smoker is different and has its own unique characteristics. You will need to replace the log every 45 minutes to 1 hour or so to keep the temperature steady. The flavor of that last brisket I made was unlike anything I had tasted at home before. I felt like I had truly accomplished something special.
There are so many variables when smoking meat, but he key to good BBQ is a steady fire with clean smoke. Ribs are probably the easiest because they are a very forgiving meat and don’t take too long to cook. Pork butts, which typically take much longer to cook, are also forgiving and are good to learn with, but let’s stick to ribs today. I’m going to tell you exactly how I smoke my ribs these days, from rub, to method to sauce used. This is NOT how I did them years ago, and they come out much better now. Let me offer this disclaimer first though; I am no Aaron Franklin. I am a backyard amateur/intermediate smoker who has learned a lot over the last few years and just wants to share my knowledge with my fellow enthusiasts.
First, I begin with racks of trimmed spare ribs with the membranes and skirts removed. Start by slathering with a little olive oil so the spices stick and use a shaker to get the spices evenly distributed. I rub my ribs with a combination of kosher salt, coarse black pepper, brown sugar, paprika, garlic powder, onion powder, cumin and dry mustard powder and let them marinate overnight. While some argue that the sugar will burn and you should leave it out, I have never had a problem with that if I keep the temps low for the few hours they are exposed before I wrap them.
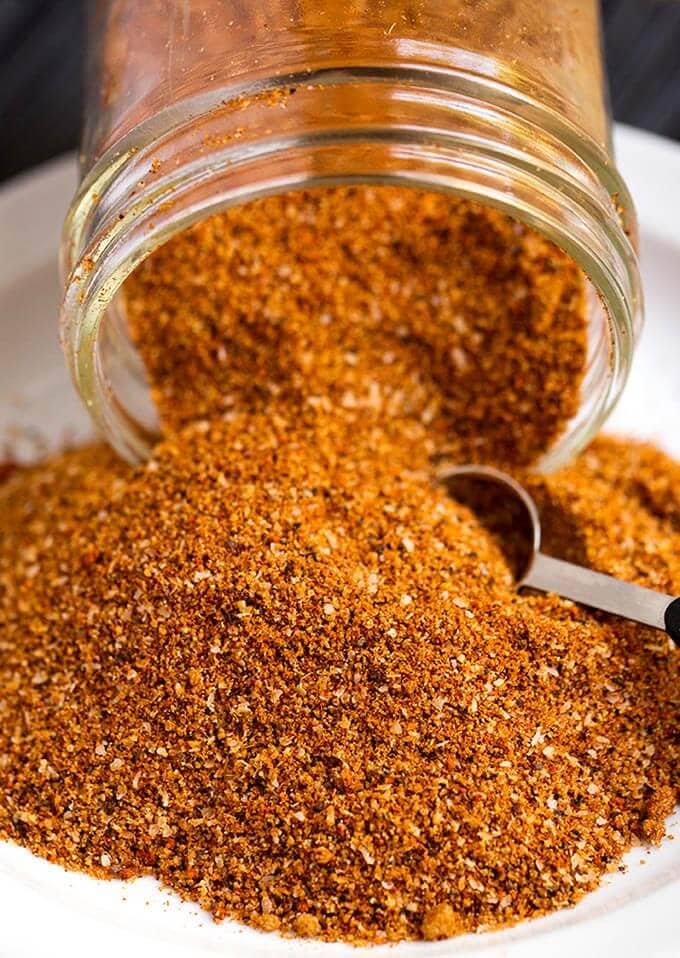
This will coat about 3 racks of ribs.
▢1/2 cup brown sugar
▢2 tablespoons Kosher salt
▢2 tablespoons black pepper
▢2 tablespoons smoked paprika
▢1 tablespoon garlic powder
▢1 tablespoon onion powder
▢1 teaspoon cumin
▢1 teaspoon ground mustard
The next morning I pull them out of the refrigerator and let them come up to near room temperature while I get the smoker ready. Fill a chimney starter halfway with hardwood lump charcoal and light (NO LIGHTER FLUID). Once the charcoal gets hot and ready, about 15 minutes, dump it in the middle of the firebox and add one small log of hickory or applewood. Let this burn for 20-30 minutes and the cooking chamber should reach 225-250 degrees. Word of advice though, do not trust the temperature gauge that comes on the grill. It is almost never at the level of the cooking grates so the temperature is not being measured where the meat is. I find it can be 50-75 degrees off the actual temperature at grate level. Invest in a digital thermometer for the grill, one with two probes; one for the grill and one for the meat. This is a really good one. While you won’t need the probe for the meat with ribs, it will be important to have when you start cooking pork butts or brisket, where the internal temperature is so critical. Make sure there is also a water pan to keep moisture in the cooking chamber. This is particularly important for longer smokes.
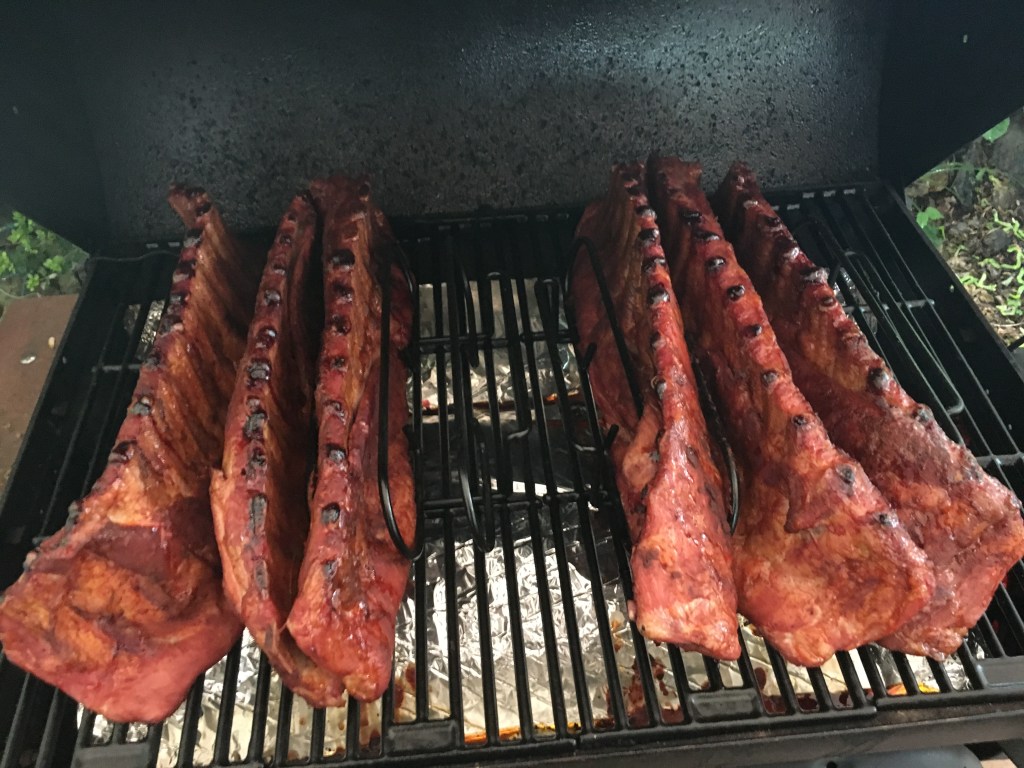
It’s time to put the ribs on! I usually smoke several racks of ribs at a time, and use a rib rack so that I can fit them all on the grill. This allows them to stand up vertically and still absorb that smoke flavor.

Arrange them as evenly as you can across the cooking chamber and close the lid for 3 hours. You may want to shift them around after a couple hours to avoid overcooking in any “hotspots” you might have inside the cooking chamber. There is a saying however, “if you’re looking, you ain’t cooking.” Everytime you open the lid to look, all the smoke and heat escape and you add to the cook time. I know it’s tempting, they are beautiful and you really want to see their progress, but don’t look unless you have to. This also helps the ribs develop that “bark” that is so special in BBQ.
Once the ribs have been smoking undisturbed at 225-250 degrees for 3 hours, wrap them in foil with a couple tablespoons of apple juice and return them to the grill for 2 more hours. This will essentially speed up the cooking process and make them tender. This is also called the “Texas crutch.” One thing to be aware of, however, is that the more racks of ribs you are cooking, the longer you may have to cook them. If you are cooking 1 or 2 slabs without the rib racks, you will definitely be done on time, if not early (depending on factors like consistency of temperature). If you are cooking 6-8 slabs using the rib racks, you may need to add up to an hour to your cook time. Where you add it is a matter of preference really. I like to add it up front to try and get more of that smoke flavor, but you can also add a little time to the crutch. Be careful though, you can overcook them that way too. If you think you have gone too far with the crutch, only cook them with the sauce for a little bit, just long enough for the sauce to set. Also, if you are trying to smoke baby backs, the 3-2-1 method is not for you. They only need around 4-4 1/2 hours to cook. Maybe try smoking them for 2 hours, wrapping them for 1 1/2 hours and then sauce them for another hour or so. In either case, you ultimately want the bones to pull out fairly easily without falling apart at the touch. Every smoker is different and every smoke is different. Getting to know your smoker is important, and being patient is too. Your food will be ready when it’s ready, but a steady, clean fire will help things be more consistent.

After they cook for 2 hours or so wrapped in foil, gently uncover and add sauce before returning to the racks to cook for 1 more hour. There are so many sauces out there to use, it’s really up to your preference, but I found one that isn’t too sweet and has the right amount of tang. Texas style sauces are much thinner than traditioal BBQ sauces, but these aren’t Texas style ribs. I use Bullseye Original barbecue sauce. Its flavor is exactly what I’m looking for, as is its fairly thick consistency. You can always make your own, there are many recipes out there, but this one works well for me so I don’t bother.


After that last hour is up, it’s time to take them off the grill. The sauce should have thickened up a bit and darkened in color. The bones should be sticking out a quarter to a half inch or so from the meat with dark, but not too burnt spots. Let them rest for a bit before you cut them, but the bones should pull out easily so be careful.
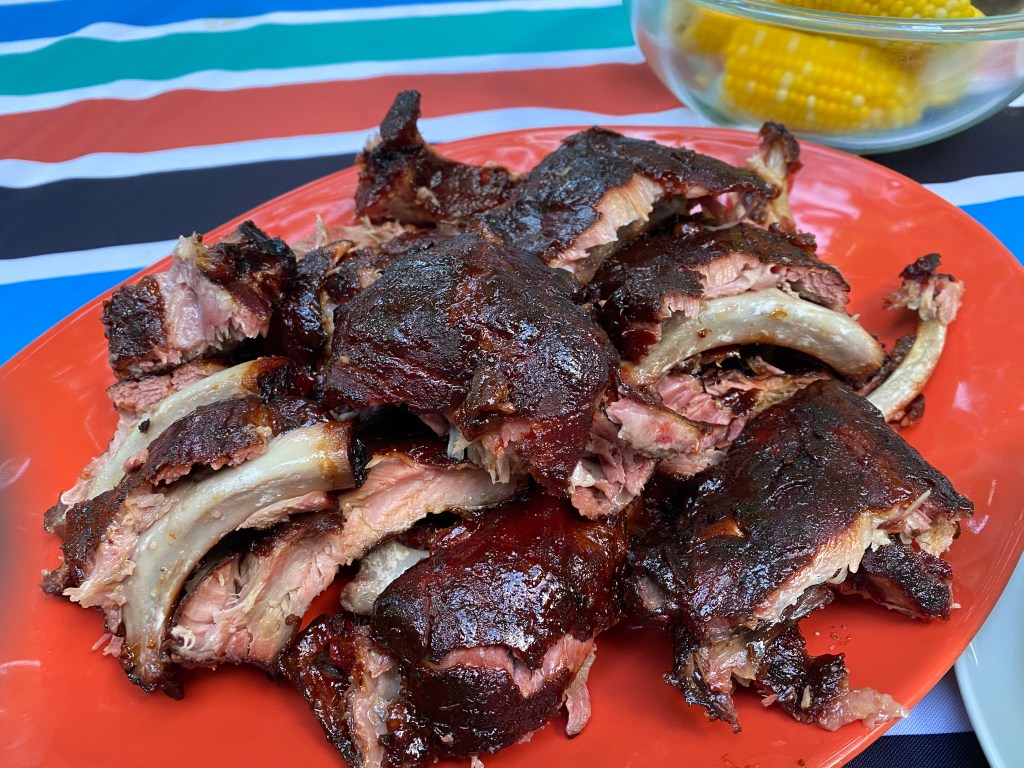
And there you have it! The photo above is from a cook with baby back ribs that I went a little too far on. The bark, as you can see, is great, which was surprising because I left them in the foil a little too long so that they were falling apart to the touch. At least the flavor was still great. However, the hardest part of any smoke is making sure the fire is burning clean and at the right temperature for the many hours needed to cook the meat. Sometimes i had to open the lid slightly to cool off the cooking chamber or let in more air to the firebox to raise or lower the temperature, but I check the fire constantly. A steady fire is the secret to good BBQ, and that takes patience and determination. I plan on doing a post strictly about fire management in the near future, but in the meantime, try these ribs and leave a comment letting me know how it worked out.

One response to “It started with ribs.”
Great post. I had no idea so many subtleties and nuances were at play to make the perfect smoke and meaty goodness. I still dream about those ribs.
LikeLiked by 1 person