
I’ve been trying to upgrade my smoker, a necessity in my opinion, for quite some time. Well it finally happened and I couldn’t be happier. I feel like a kid with a new toy.
There were a few things I was looking for in a smoker. My old smoker, the “Chargriller Smokin’ Pro,” was very poorly designed, but I didn’t know anything about offset smokers when I bought it 8 years ago. The smoke leaked out everywhere, and I mean everywhere. It was made of very thin metal and was bolted together. The exhaust stack was located on top, which meant that the airflow, which wasn’t good to begin with, was mostly drawn along the top of the smoker, not where the food was at grate level. I was able to make some modifications that helped, but not enough.
After reading Aaron Franklin’s book, Franklin Barbecue-A Meat Smoking Manifesto, and watching his videos on YouTube, along with his MasterClass, I learned a lot about what makes a great smoker. There are also several other great BBQ videos on YouTube, but Aaron Franklin is widely considered the best. I learned that thick steel smokers insulate heat much better, which means more consistent temperatures in the cooking chamber (critically important) and less wood consumption. I learned that the exhaust should be at grate level so that it draws smoke over the grate where the meat is. I learned that the stack itself, its height and width, is largely responsible for the airflow through the cooking chamber. I learned that the better the airflow, the better the convection, which means I shouldn’t be concerned with the damper on the stack at all, keep it wide open, and the door to the firebox should also be open for the most part, only closing it to block wind and rain from interrupting the consistency of the fire. My old smoker had very few, if any of these qualities.
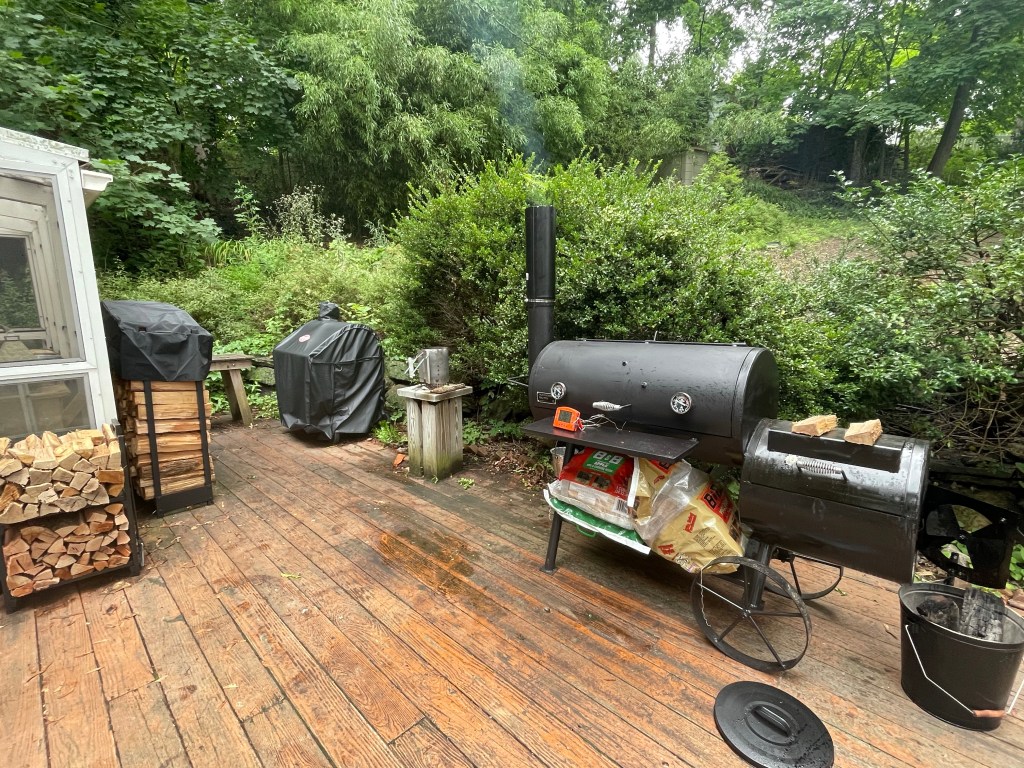
After scouring the internet for smokers with all these qualities in mind, the realization set in that there weren’t very many made to these specifications. Most were made of thin metal, had the stack located too high and were bolted together rather than having welded seams that don’t leak smoke. Aaron Franklin built his own smokers for his restaurant, and custom built smokers can cost thousands. Then I came across the Old Country BBQ Pits Brazos, and its little brother the Pecos. Designed in south Texas and manufactured right across the border in Mexico, it had virtually every feature I was looking for. The Brazos has 1/4 inch thick steel, 5 1/2 or 6 inch stack at grate level, welded seams and a nice wide door in the firebox. Not to mention, several of the pit masters I watch on YouTube, including Aaron Franklin (before he started selling is own backyard smokers at $4500 a piece) use Old Country BBQ Pits smokers. It wasn’t perfect, but I wasn’t going to find perfect in my price range. And the Brazos, at $1000, wasn’t in my price range either. Enter the Pecos. Designed with almost the exact same specifications as the Brazos, but with 14 gauge steel (roughly 1/8 inch thick), with an 11ga door, it was about twice the thickness of my old smoker. And at $450, it was in my price range. The problem is they are only sold at Academy Sports stores, which don’t exist here in the Northeast. Plus, after reading a ton of reviews, I learned that you needed to pick one out in person because though they will ship them, they frequently come damaged, and returning a 225 pound smoker hundreds of miles away isn’t my idea of good time. I was scheduled for a road trip down South and would pass by several Academy stores along the way, so the plan was to look at several of them, pick one out and tow it back to NY. After several setbacks however, I ended up rolling the dice and having it shipped. I was very lucky and a couple weeks later I received my smoker in better shape than the ones I saw in the store!
I had also picked up a 1/4 face cord of oak and cherry wood, as that seems to be the wood I like to use the most. It gets expensive buying wood by the cubic foot. At $20 a bag, and figuring about 2 bags per cook, in the case of a brisket, I was adding $40 to the price of each cook with an already expensive piece of meat. Even ribs have gotten expensive lately. A 1/4 face cord should last me nearly a year, and at $250, the value was pretty good. I can get twice the cooks at that price as compared to buying it by the cubic foot. A 1/4 face cord is a little over 21 cubic feet I believe, so I figure I’m saving roughly $200 a year on wood alone. I actually use my miter saw to cut the 16” logs in half then chop those into smaller 8” splits. I find it’s easier to keep my smoker to temp with smaller splits.
Anyway, back to the Pecos. After washing off the machine oil and installing two Tel-Tru thermometers at grate level on both sides of the cooking chamber, I coated the inside with oil and seasoned it for a few hours. At the same time I was trying to learn where its hot spots were, how the air flowed across the cooking chamber, how easy was it to keep a low, consistent temperature and how much wood it took to do so. Initially I built a fire roughly the same size as I would have in my old smoker, but that shot the temp up to 450 degrees. Eventually I learned that a small coal bed with 2 small 8” splits of wood kept it at roughly 250, my optimal temperature. Because the Pecos is better insulated than my old smoker, less heat escapes so a smaller fire keeps it to temp. The airflow could’ve been a little better though. The stack was at grate level, but only about 16” high if I remember correctly. In Aaron Franklin’s book he describes the optimal height for the stack should be about 3/4 the width of the cooking chamber, which was 40” in the case of the Pecos. So I needed to extend my stack up to 30”. After seeing a video about just this topic, I learned that you can use 6” black stove pipe to extend the stack as much as you wanted. After experimenting on different lengths just to see what would happen (which meant cutting the pipe several times) 30” turned out to be just right. Using my digital probes on either end, because the analog thermometers I installed were not as accurate as I had hoped (they read a solid 25+ degrees lower than my digital probes), I was able to get the temps within 5 degrees on either side of the cooking chamber. This did include a couple other modifications as well and I still need a few tuning plates to complete the process and eliminate the hot spot by the stack, but it was interesting to see the airflow change as I changed the length of the stack. With the lower stack height, the firebox side was hotter by 25-50 degrees, which makes sense. But when I first extended the stack, a 24” extension , the hot spot switched to the other side. The air was flowing too fast and wasn’t able to flow out the exhaust evenly, causing it to bounce around on the stack side increasing the temps 25-50 degrees. A 30” stack seemed to slow it down enough to even out the flow for the most part.


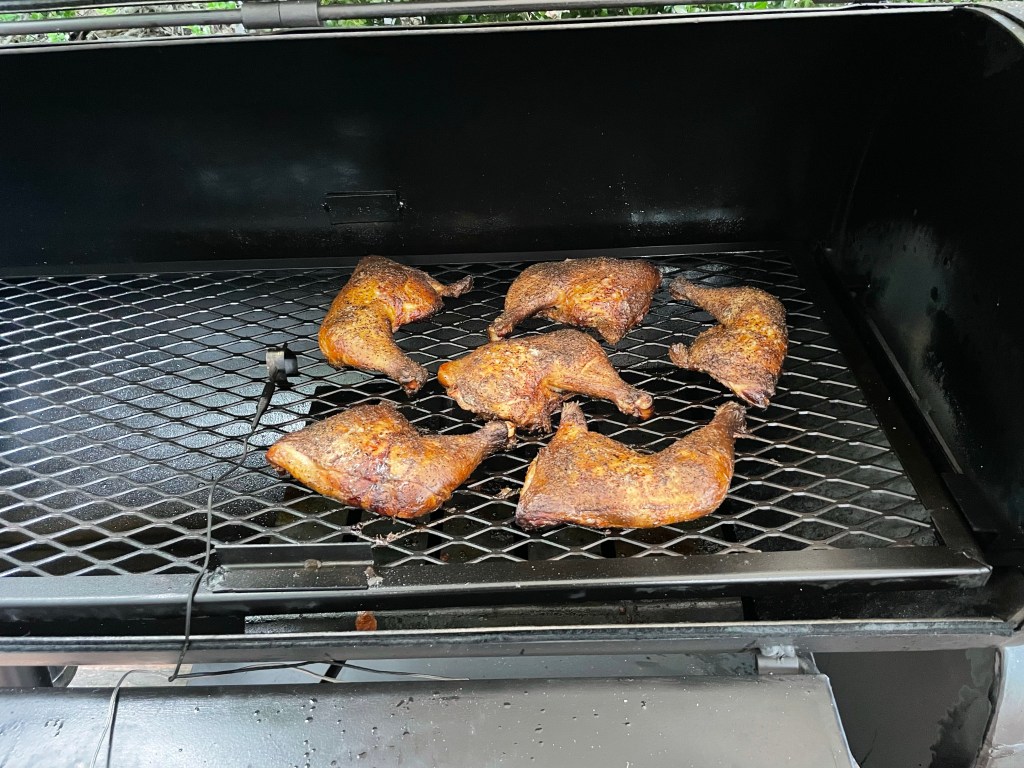
Now that my new smoker was all seasoned, it was time to start cooking on it. I chose some chicken leg quarters to test first, smoked with some pecan wood I picked up. I had never used pecan before and had heard good things, so I thought I would give it a try. I was able to get some good color and smoke on the legs, but experienced some pretty wild temperature swings along the way so they came out a little drier than I’d hoped. I wasn’t able to get the skin as crispy as I’d hoped either. After trying them, we decided that pecan wasn’t for us. We just didn’t like it. It has a bright woody flavor, but not very appealing to me. Some people swear by it, but I’ll stick to my staples of hickory, apple or an oak and cherry mixture.
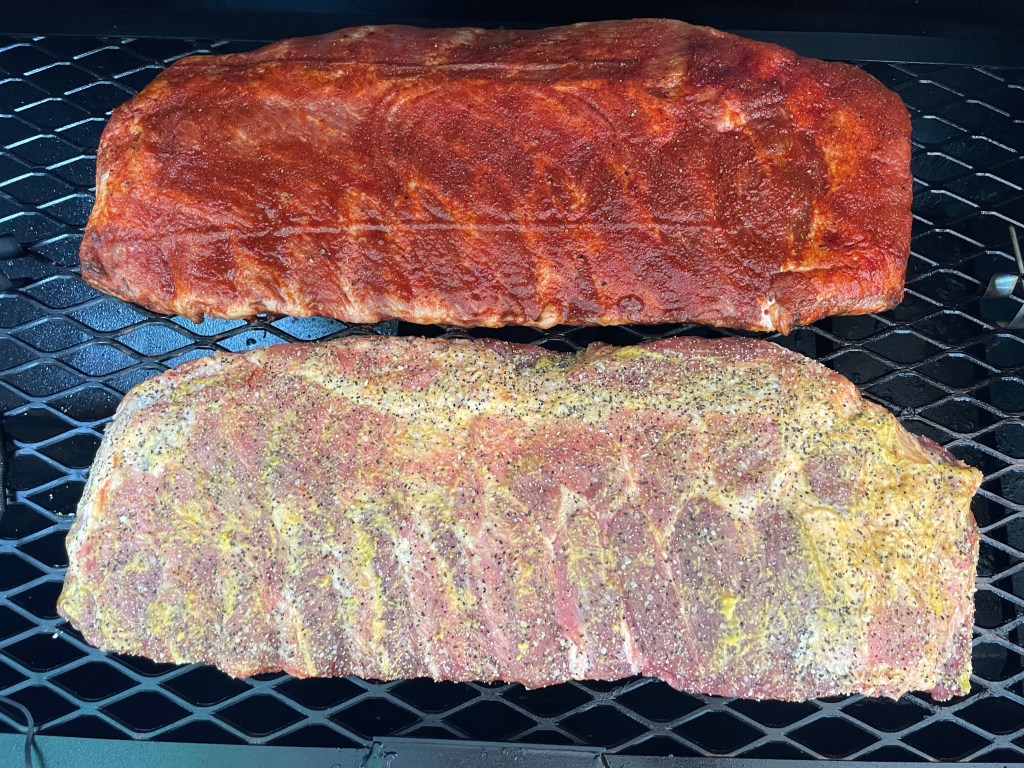
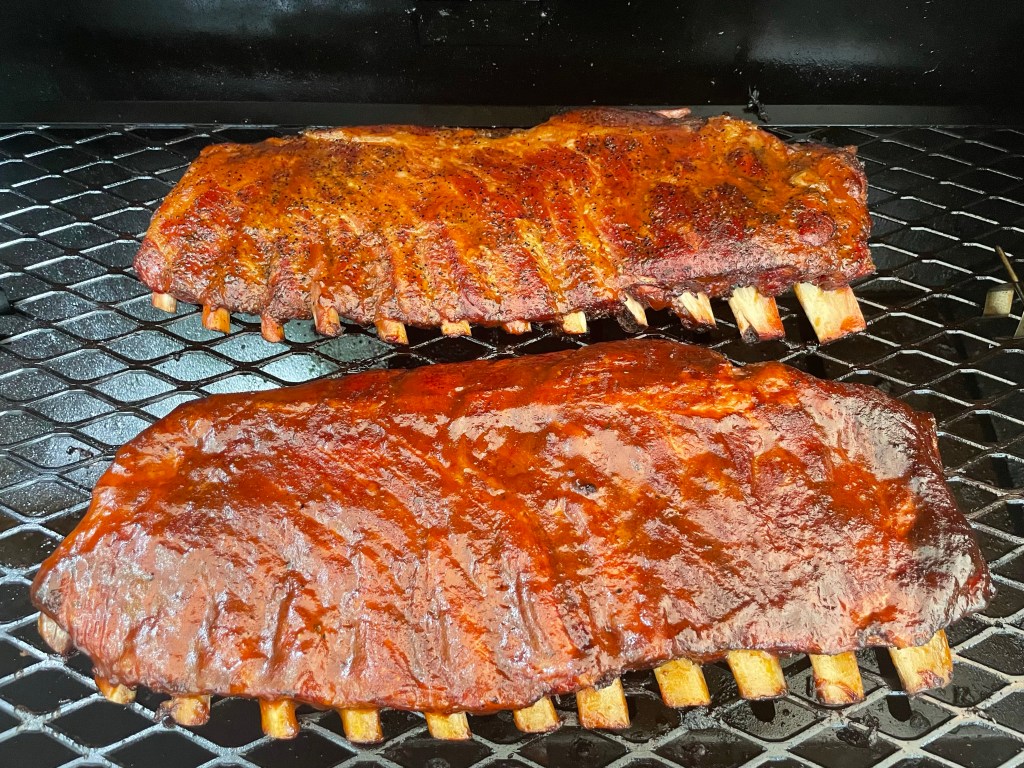
This weekend, I went for a longer cook to get to know the Pecos. The chicken took about 3 hours, so now I would try some ribs, which typically take 6 hours to cook. This time, I was able to get much better results. I was able to keep the temps between 225-250, although there were several spikes over 275, but this wasn’t terrible, better than with the chicken. I was using hickory and full spare ribs. I tried a comparison between my own rub recipe, the way I’ve been making ribs for years, and Aaron Franklin’s recipe, a yellow mustard slather with salt and pepper only. I give out the recipe for my rib rub in an earlier post about ribs. I smoked them both for about 3 1/2 hours, wrapped them for about 1 1/2 hours and then glazed them and let them set on the smoker for another 1/2 hour or less. When all was said and done, I was very happy with the results. They were both juicy and not quite falling off the bone tender. The Texas style ribs had a much more intense smoke flavor than did my ribs. I had recently read a theory that the more rub you put on meat, the less smoke can be absorbed, particularly if you are using a lot of powders, which I do. I wanted to compare and the consensus in my house was that my ribs tasted better. They are sweeter. Only having salt and pepper on the ribs allows for a lot more smoke, and there certainly was a much more intense hickory flavor on Aaron’s ribs. I think I would like to marry the two and have a stronger smoke flavor under the sweetness of my rub. I’ll work on that.


In the meantime, I’m going to keep experimenting. That’s really the only way to learn. Get to know your smoker. Next weekend I’m smoking my first brisket on the Pecos. I think I have the temperature dialed in better now. Let’s see if I can keep it steady for the 12+ hours needed to cook a good brisket. I’ll let you know how it turns out.

3 responses to “Old Country BBQ Pits Pecos Offset Smoker”
Thank you for your article!
Please provide information about the tuning plates and the other modifications to the Pecos smoker.
I am going to purchase one this week.
Blessings,
John
LikeLike
Thanks for your comment John! Since I published this article, I have experimented with tuning plates, extending the stack to 30 inches, and removing the baffle. I need to update the post as the only thing that really improved the smoker was removing the baffle. Yes, there is still a hot spot, but it was now by the fire box, not in the middle of the smoker. The tuning plates didn’t give me the results I was looking for, and the stack extension just moved the hot spot further left toward the stack. I now get even heat across the left 3/4 of the cooking chamber (+/- 5 degrees on most occasions). After putting the water pan over the hot spot I can fit 2x 12lb briskets and 2 pork butts on the grate without burning the pork butts, as they are usually closer to the firebox because they can take more punishment. Enjoy your Pecos. While the insulation factor is not as good as the Brazos, it is a good smoker and I have been rewarded with some amazing barbecue. Best of luck!
LikeLike
Great read. Thinking we might be the same person for a second. I started on a Char Griller as well. But I moved to an Oklahoma Joe’s. Never really cared for it. Also living in Upstate NY, always guessed the Old Country was out. But I got lucky in the spring, and found one on Facebook. Used it all summer but felt it could be better. Was looking to add the stove pipe this weekend. I will start with 30 as seemed to work for you. Thanks for the article.
LikeLiked by 1 person